DIY emergency power system – a field report
The storm disaster in NRW and Rhineland-Palatinate has shown that the fears of many scientists can quickly become reality. Within just a few hours, entire regions were cut off from the outside world. I myself was in the crisis area, as my parents and many friends from my school days live there. It is impossible to describe the picture on the ground. The same just happend in the US.

Update 26.08.2021: The project is in constant development and we welcome your comments. We have therefore expanded the article. You are welcome to send me a DM at Twitter
We as a society are used to everything working. We are dependent on functioning infrastructures. This fact is known as the vulnerability paradox and is considered the main argument for protecting critical infrastructures in particular. There are several laws to ensure the safety and availability of these infrastructures. However, natural disasters can be unpredictable and devastating.
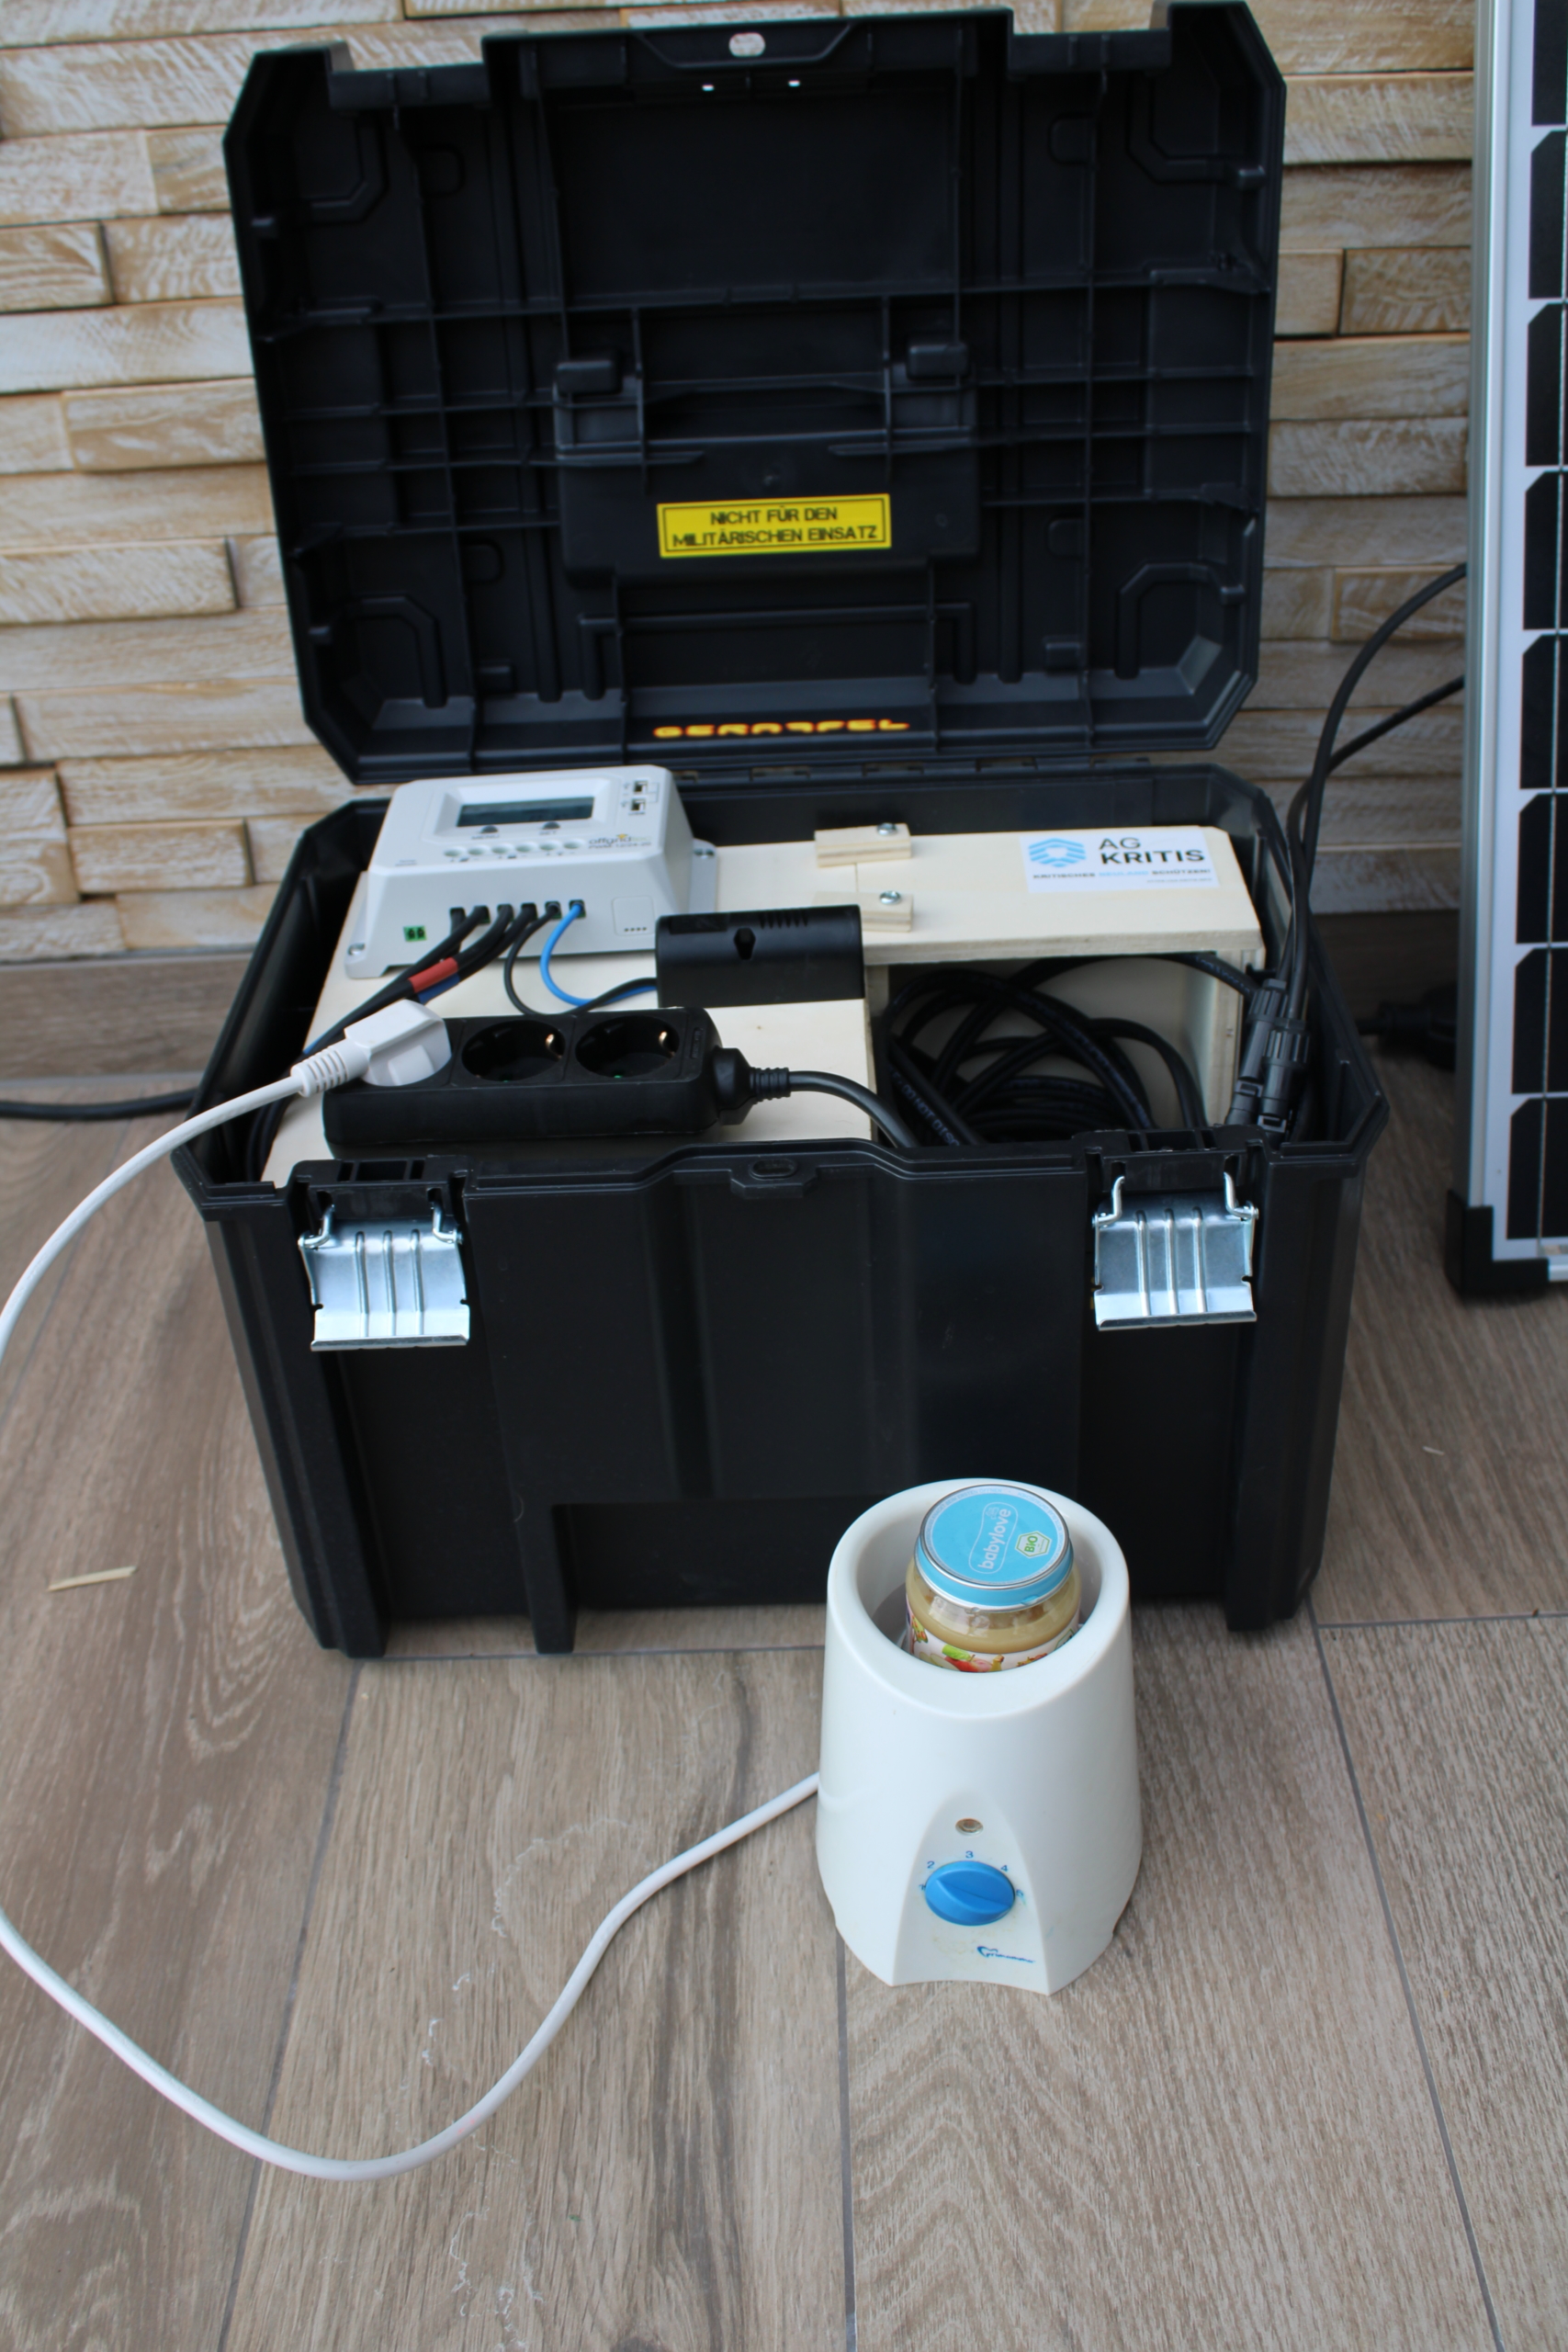
The areas I was in were relatively unsupported by german THW and the fire brigade, especially in the beginning, because first the dams and flooded areas had to be supplied. There was often no electricity, no clean water and no communication on site. Due to the failure of the mobile phone network, the battery of many mobile phones ran out much faster than usual, because mobile phones in these situations search for available networks with maximum power. Even when the mobile phone networks were partially working again, many were still not able to make phone calls due to the empty mobile phone batteries and the lack of power supply and were, for example, not able to organise help or inform their relatives and friends that they are okay and what exactly they need as support. Moreover, without electricity, there were other problems as well. Young parents could not, for example, heat the porridge or milk for their babies for lack of alternative cooking facilities.
This project therefore aims to show how to prepare for such situations and how to set up a small substitute supply with existing local resources. Normal generators require fuel and maintenance. Moreover, according to Murphy’s Law, without regular test runs they „naturally“ do not work, especially in an emergency. Depending on the need, there are very many options available on the market. A USB power bank can be enough or a large uninterruptible power supply (UPS) in the cellar. There are also corresponding systems for caravans. However, these cost over 1,000 euros.
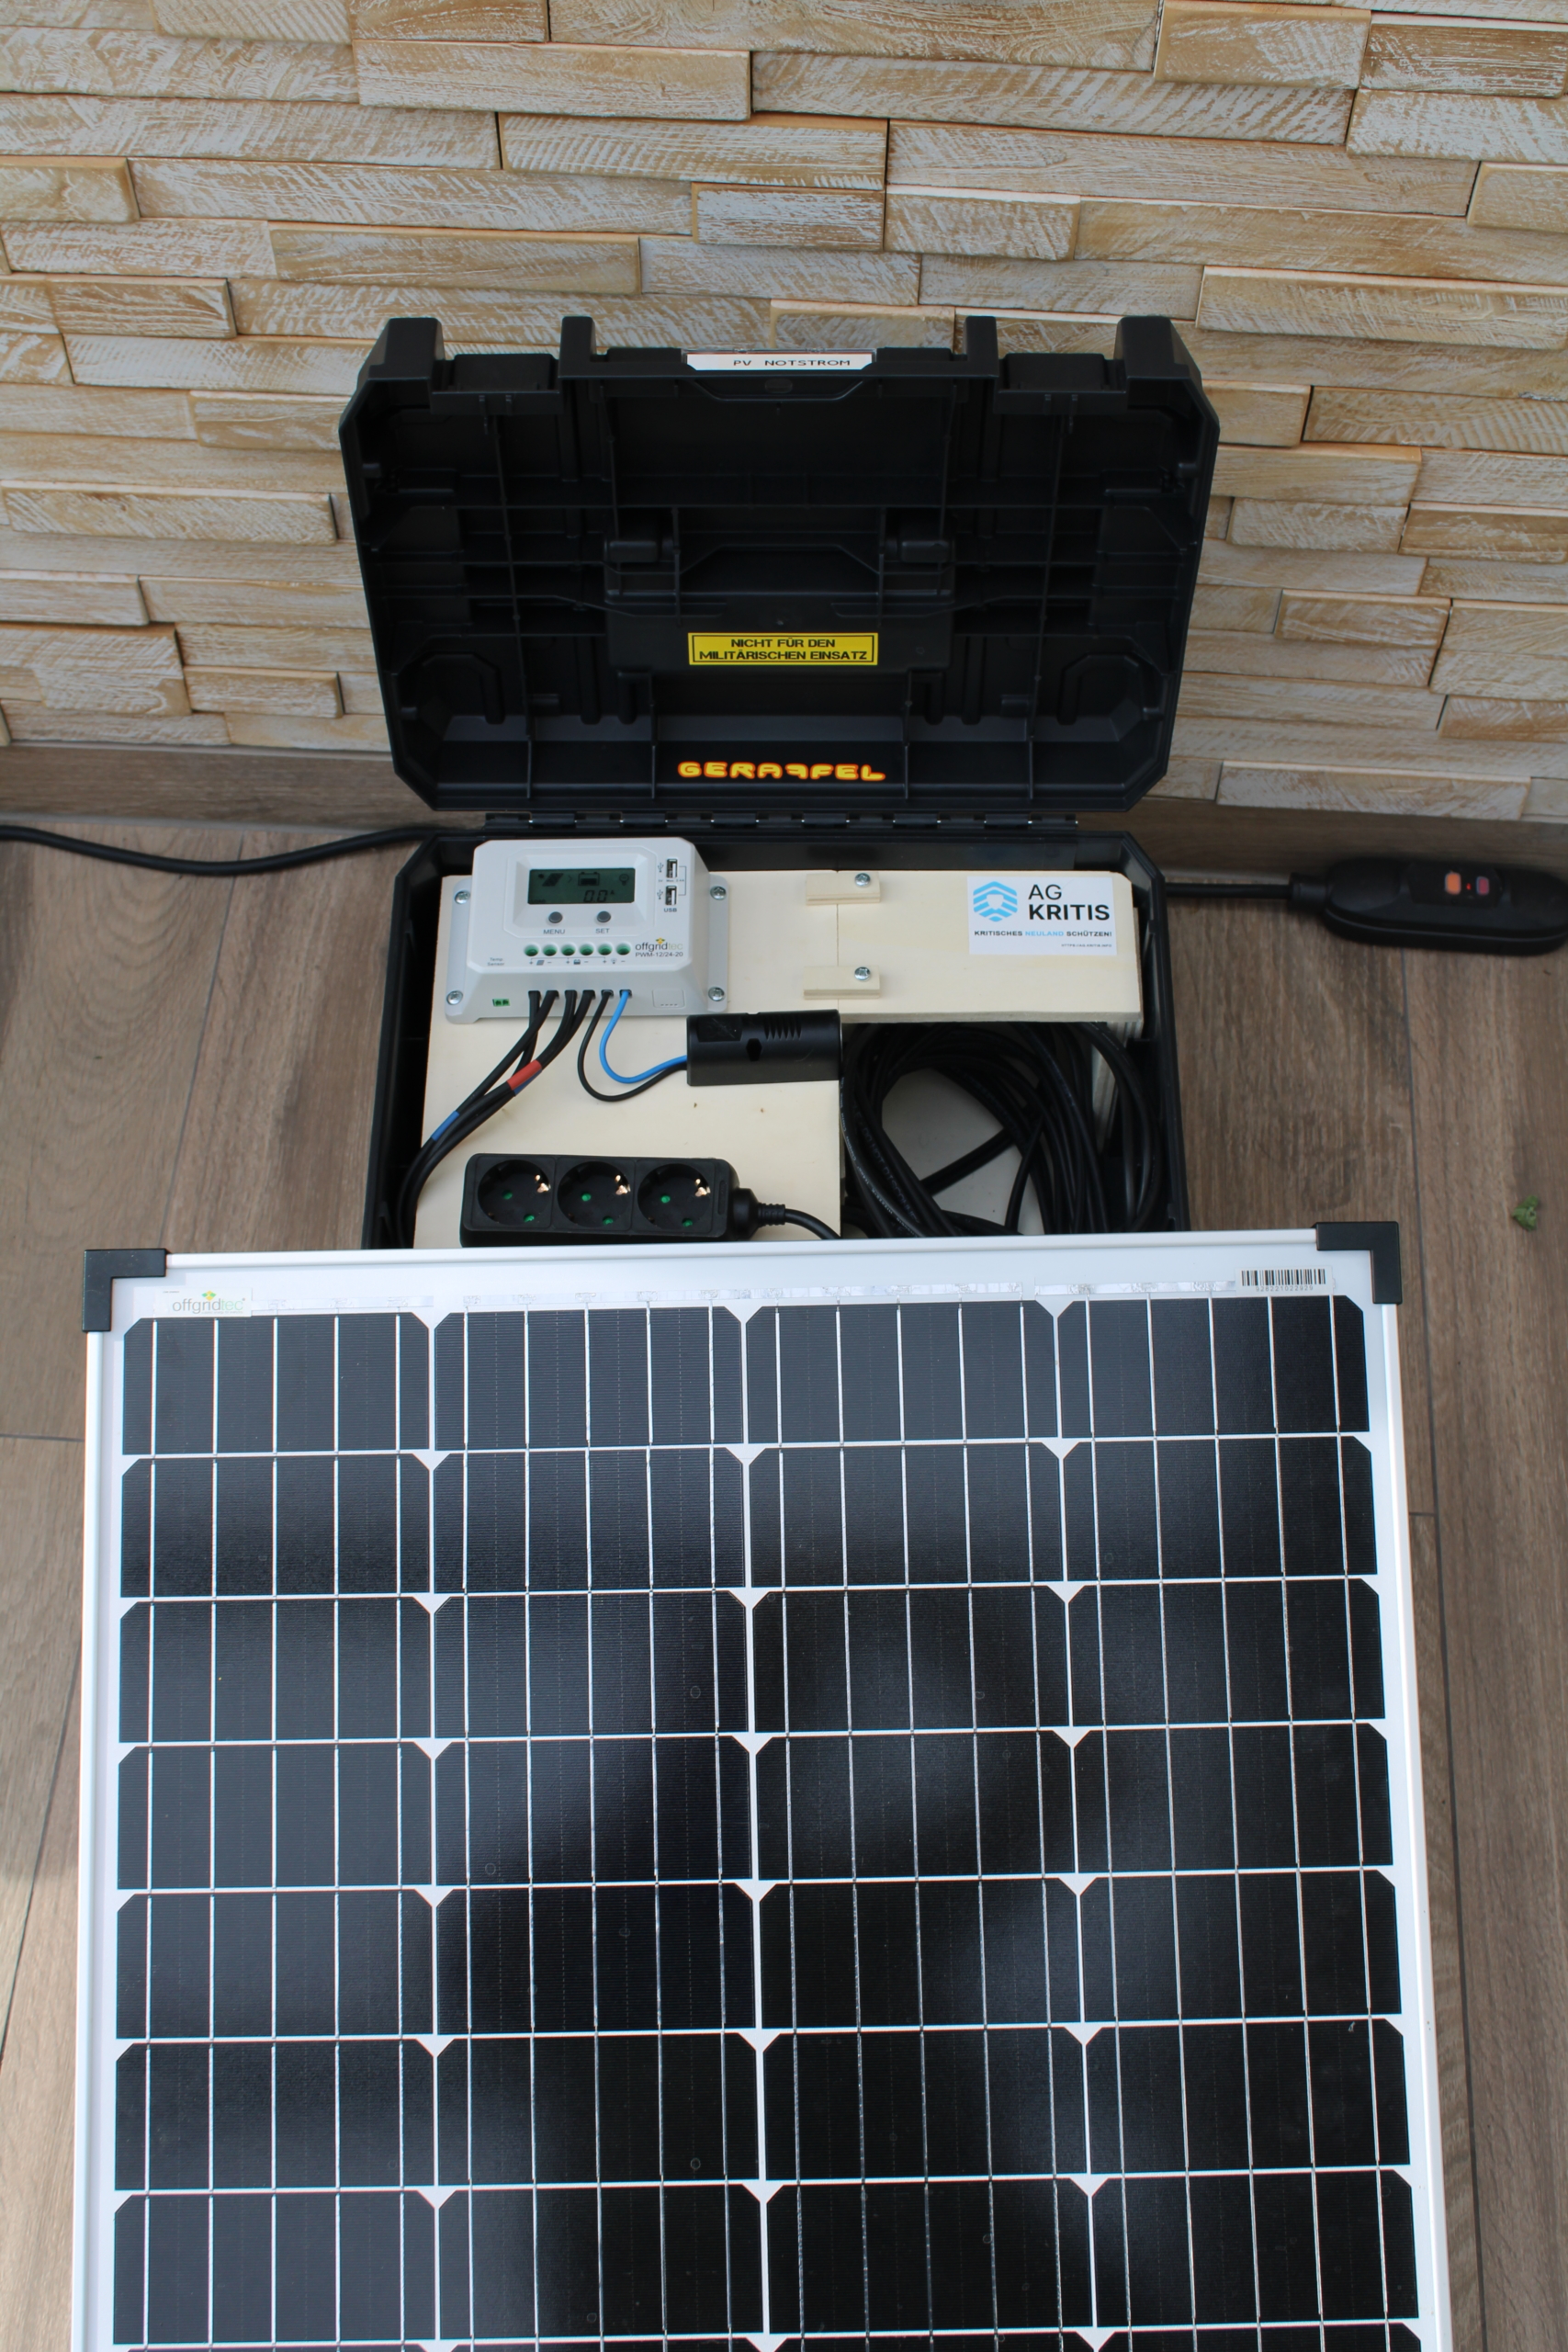
Since I already work a lot with electricity and photovoltaic systems as a hobby, I came up with the idea of a mobile emergency power supply based on photovoltaics with a battery buffer. The system should have a battery storage, support the charging of USB devices and have a 230V AC (Changeable to 110V) system for everyday things (bottle warmer, light, etc.) as well as a 12V output for chargers. Ready-made solutions are of course available for purchase. These also cost accordingly.
A key question was the choice of battery. Purchased solutions almost invariably rely on lithium-polymer accumulators (also called LiPo). However, these were excluded in this project because the use of LiPos is not entirely trivial and certainly not suitable for every craftsman. In addition, there are extreme differences in quality that can quickly end in a fire. Therefore, normal car batteries were used. A car battery is available everywhere and, in the worst case, can also be removed from a defective vehicle on site. Of course, these are not suitable for continuous use, as they are not cycle-resistant. However, we are talking about an emergency system that is only to be used a few times. LiFePO4 batteries are another but still very expensive alternative.
To remain mobile, only a small photovoltaic panel should be used. The normal panels for houses usually have dimensions of 1 metre by 1.8 metres. This does not really fit well in a car or cargo bike. Basically, the choice of technology is a matter of price and taste. To get more out of a small area, a monocrystalline module should be used because it has a better energy yield. It works just as well with the cheaper polycrystalline modules.
The last technical question was about the PV inverter. This serves as a link between the PV panel and the battery. There are two typical methods; PWM (pulse width modulation) charge controllers are the simpler devices compared to MPPT (maximum power point tracking) controllers. In terms of cost, the PWM devices are cheaper and are perfectly adequate for the application. The ultimate goal was to build a low-cost module.
The construction
First of all, it should be pointed out that the finished system also works with alternating voltage (AC). This is new territory for the normal maker. Work on these systems may only be carried out by a qualified electrician. As long as the sine wave inverter for the 230V systems has a ready-made protective mains plug , this should not be a problem. But even with 12V you can produce nice arcs at high amperage.
Assembly is relatively easy and can be done in two hours. The cost is about 320 euros. If certain things are adjusted, the targeted 250 euros can also be achieved.
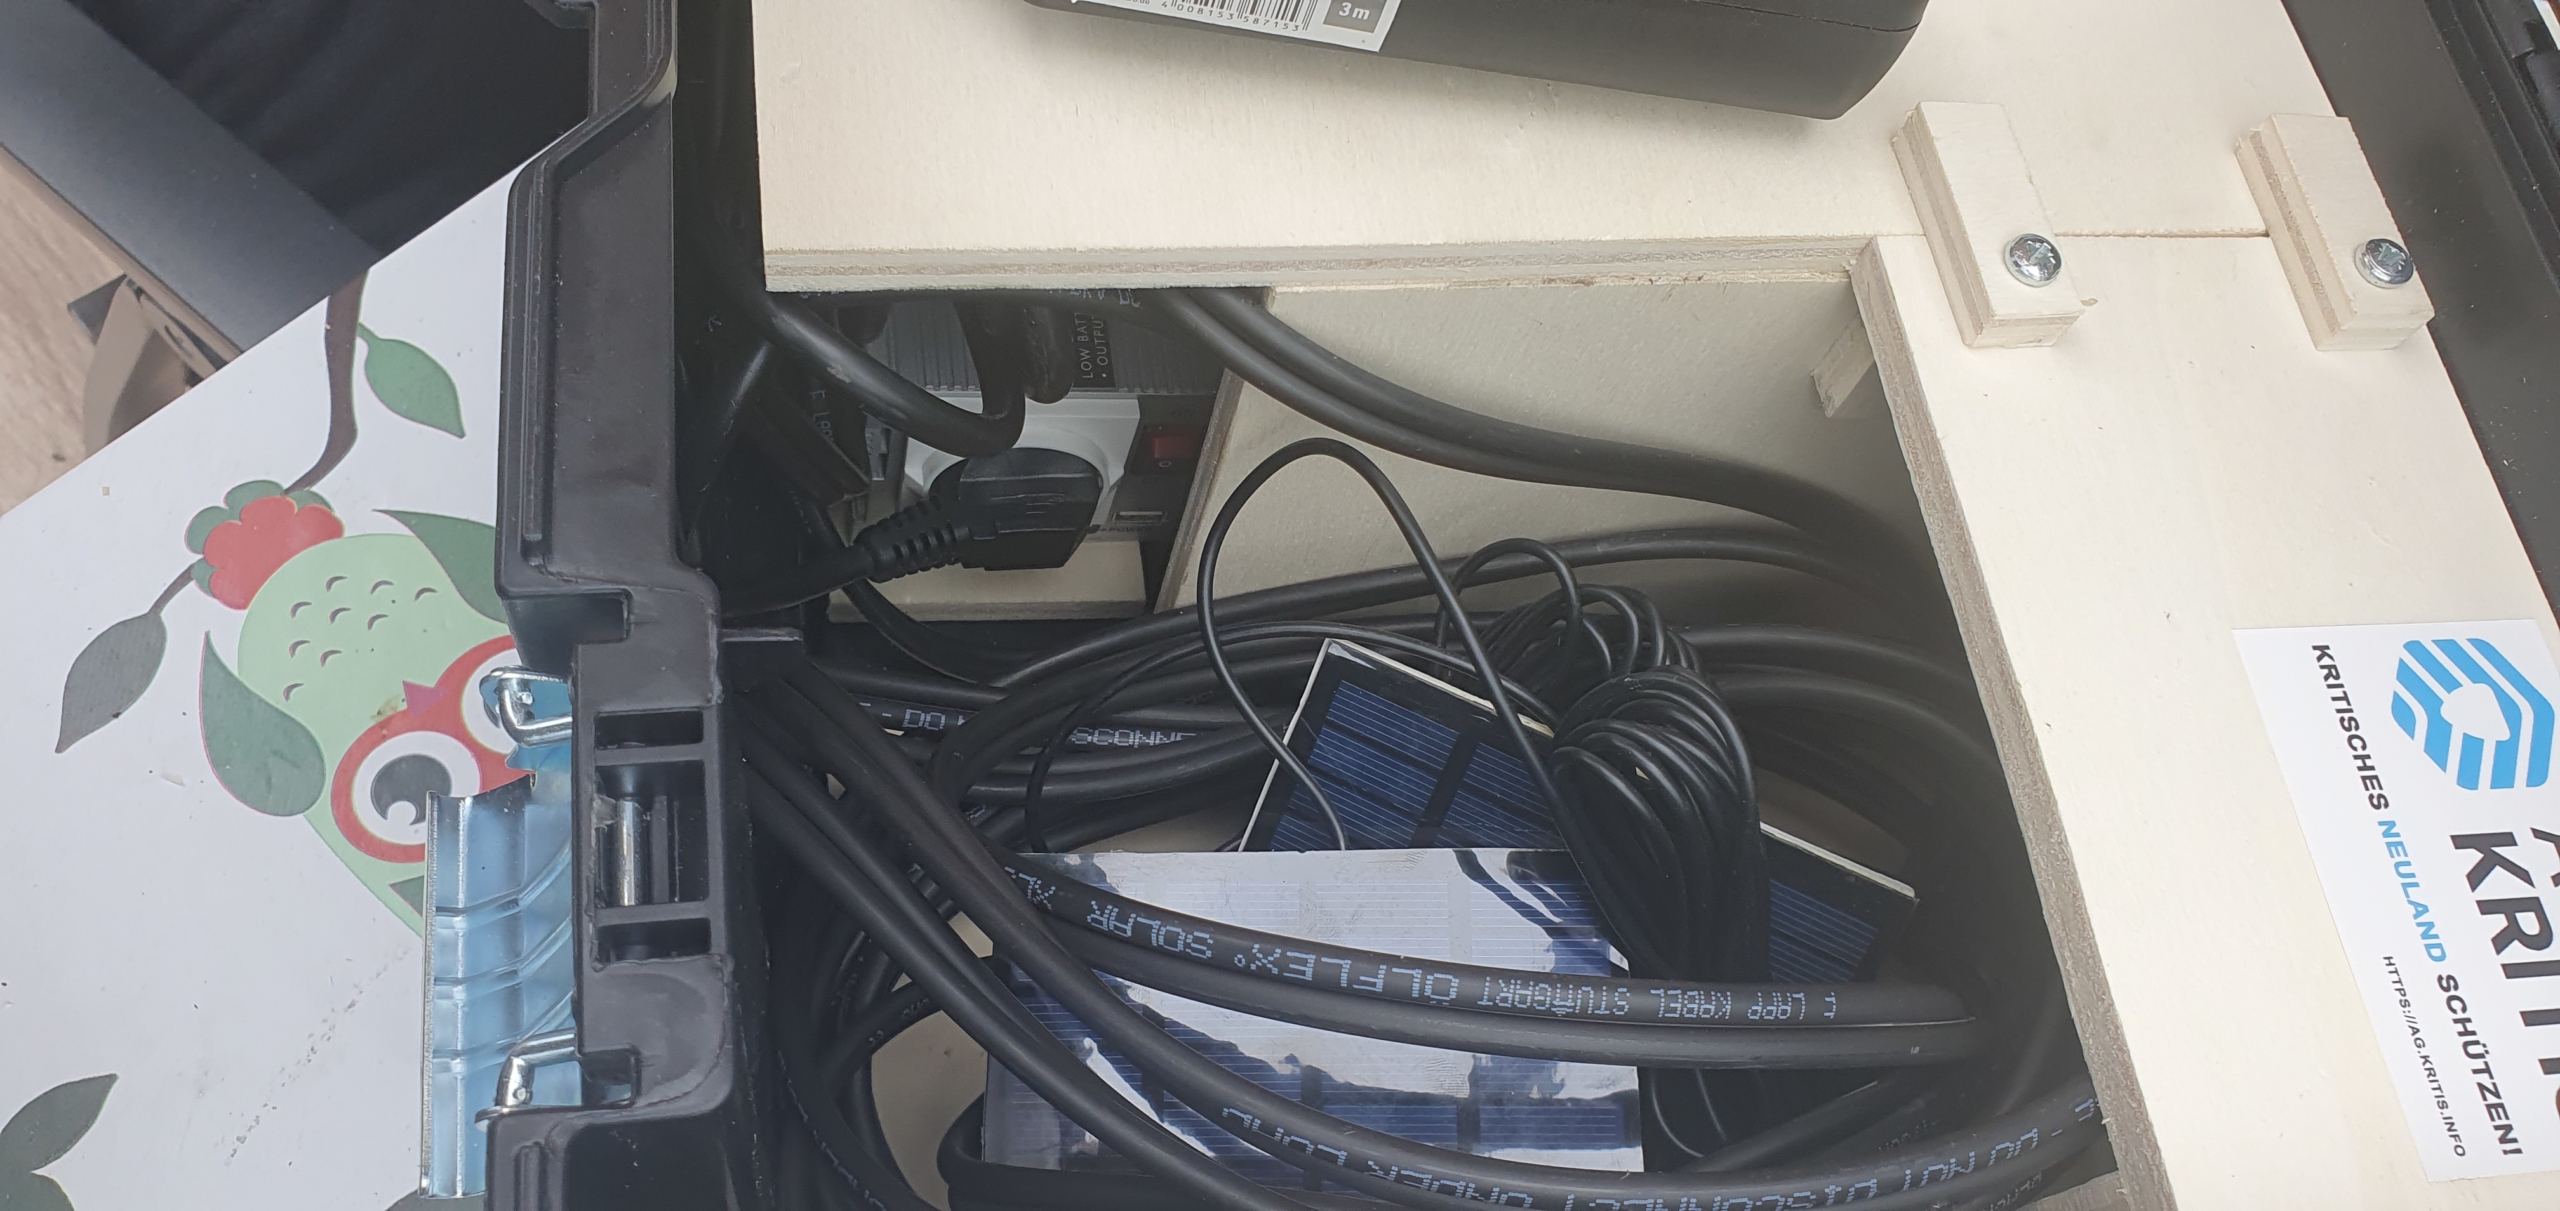
- To prevent the battery from slipping, a precisely fitting base plate is cut out of chipboard. This has a recess for the battery so that it can no longer slip. The recess must of course be cut to fit the box.
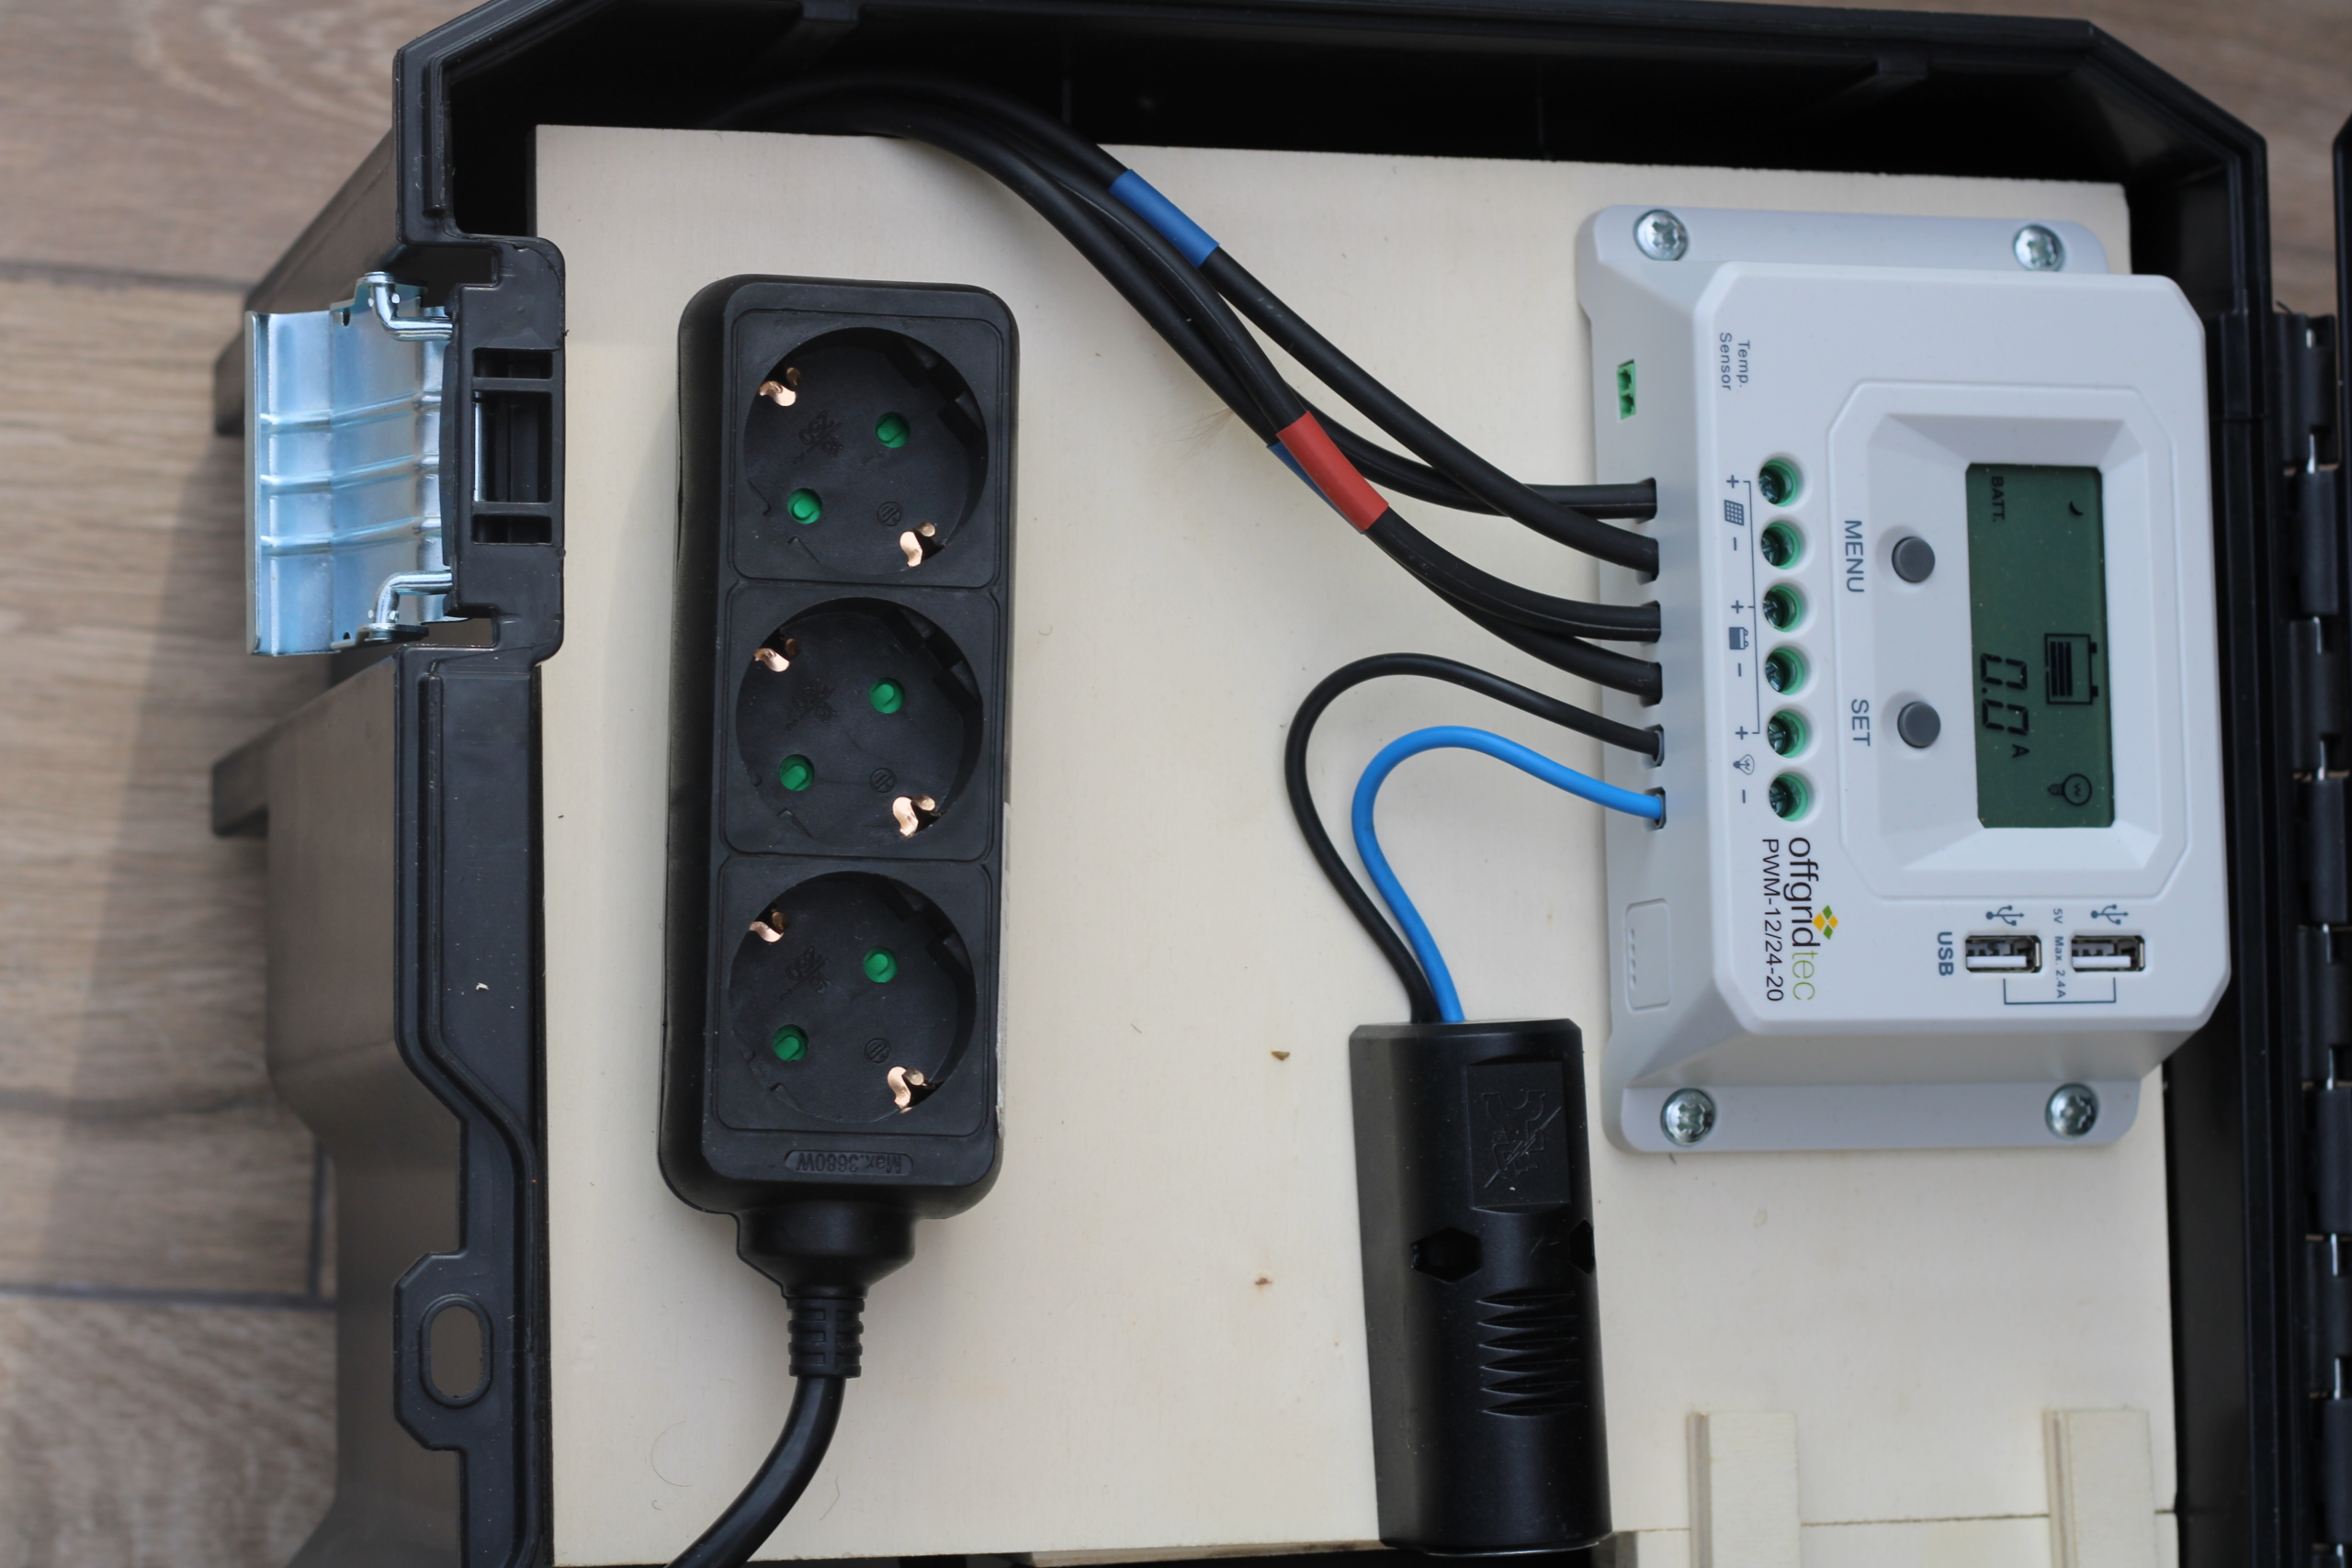
- The next step is to connect the electricity. The fuses should not be plugged in yet! There is a risk of short circuits. All cables are already included in the PV set I used. If you use your own cables, please make sure that the cable cross-sections (6-10mm) and fuses are suitable (maximum 15 cm away from the battery).
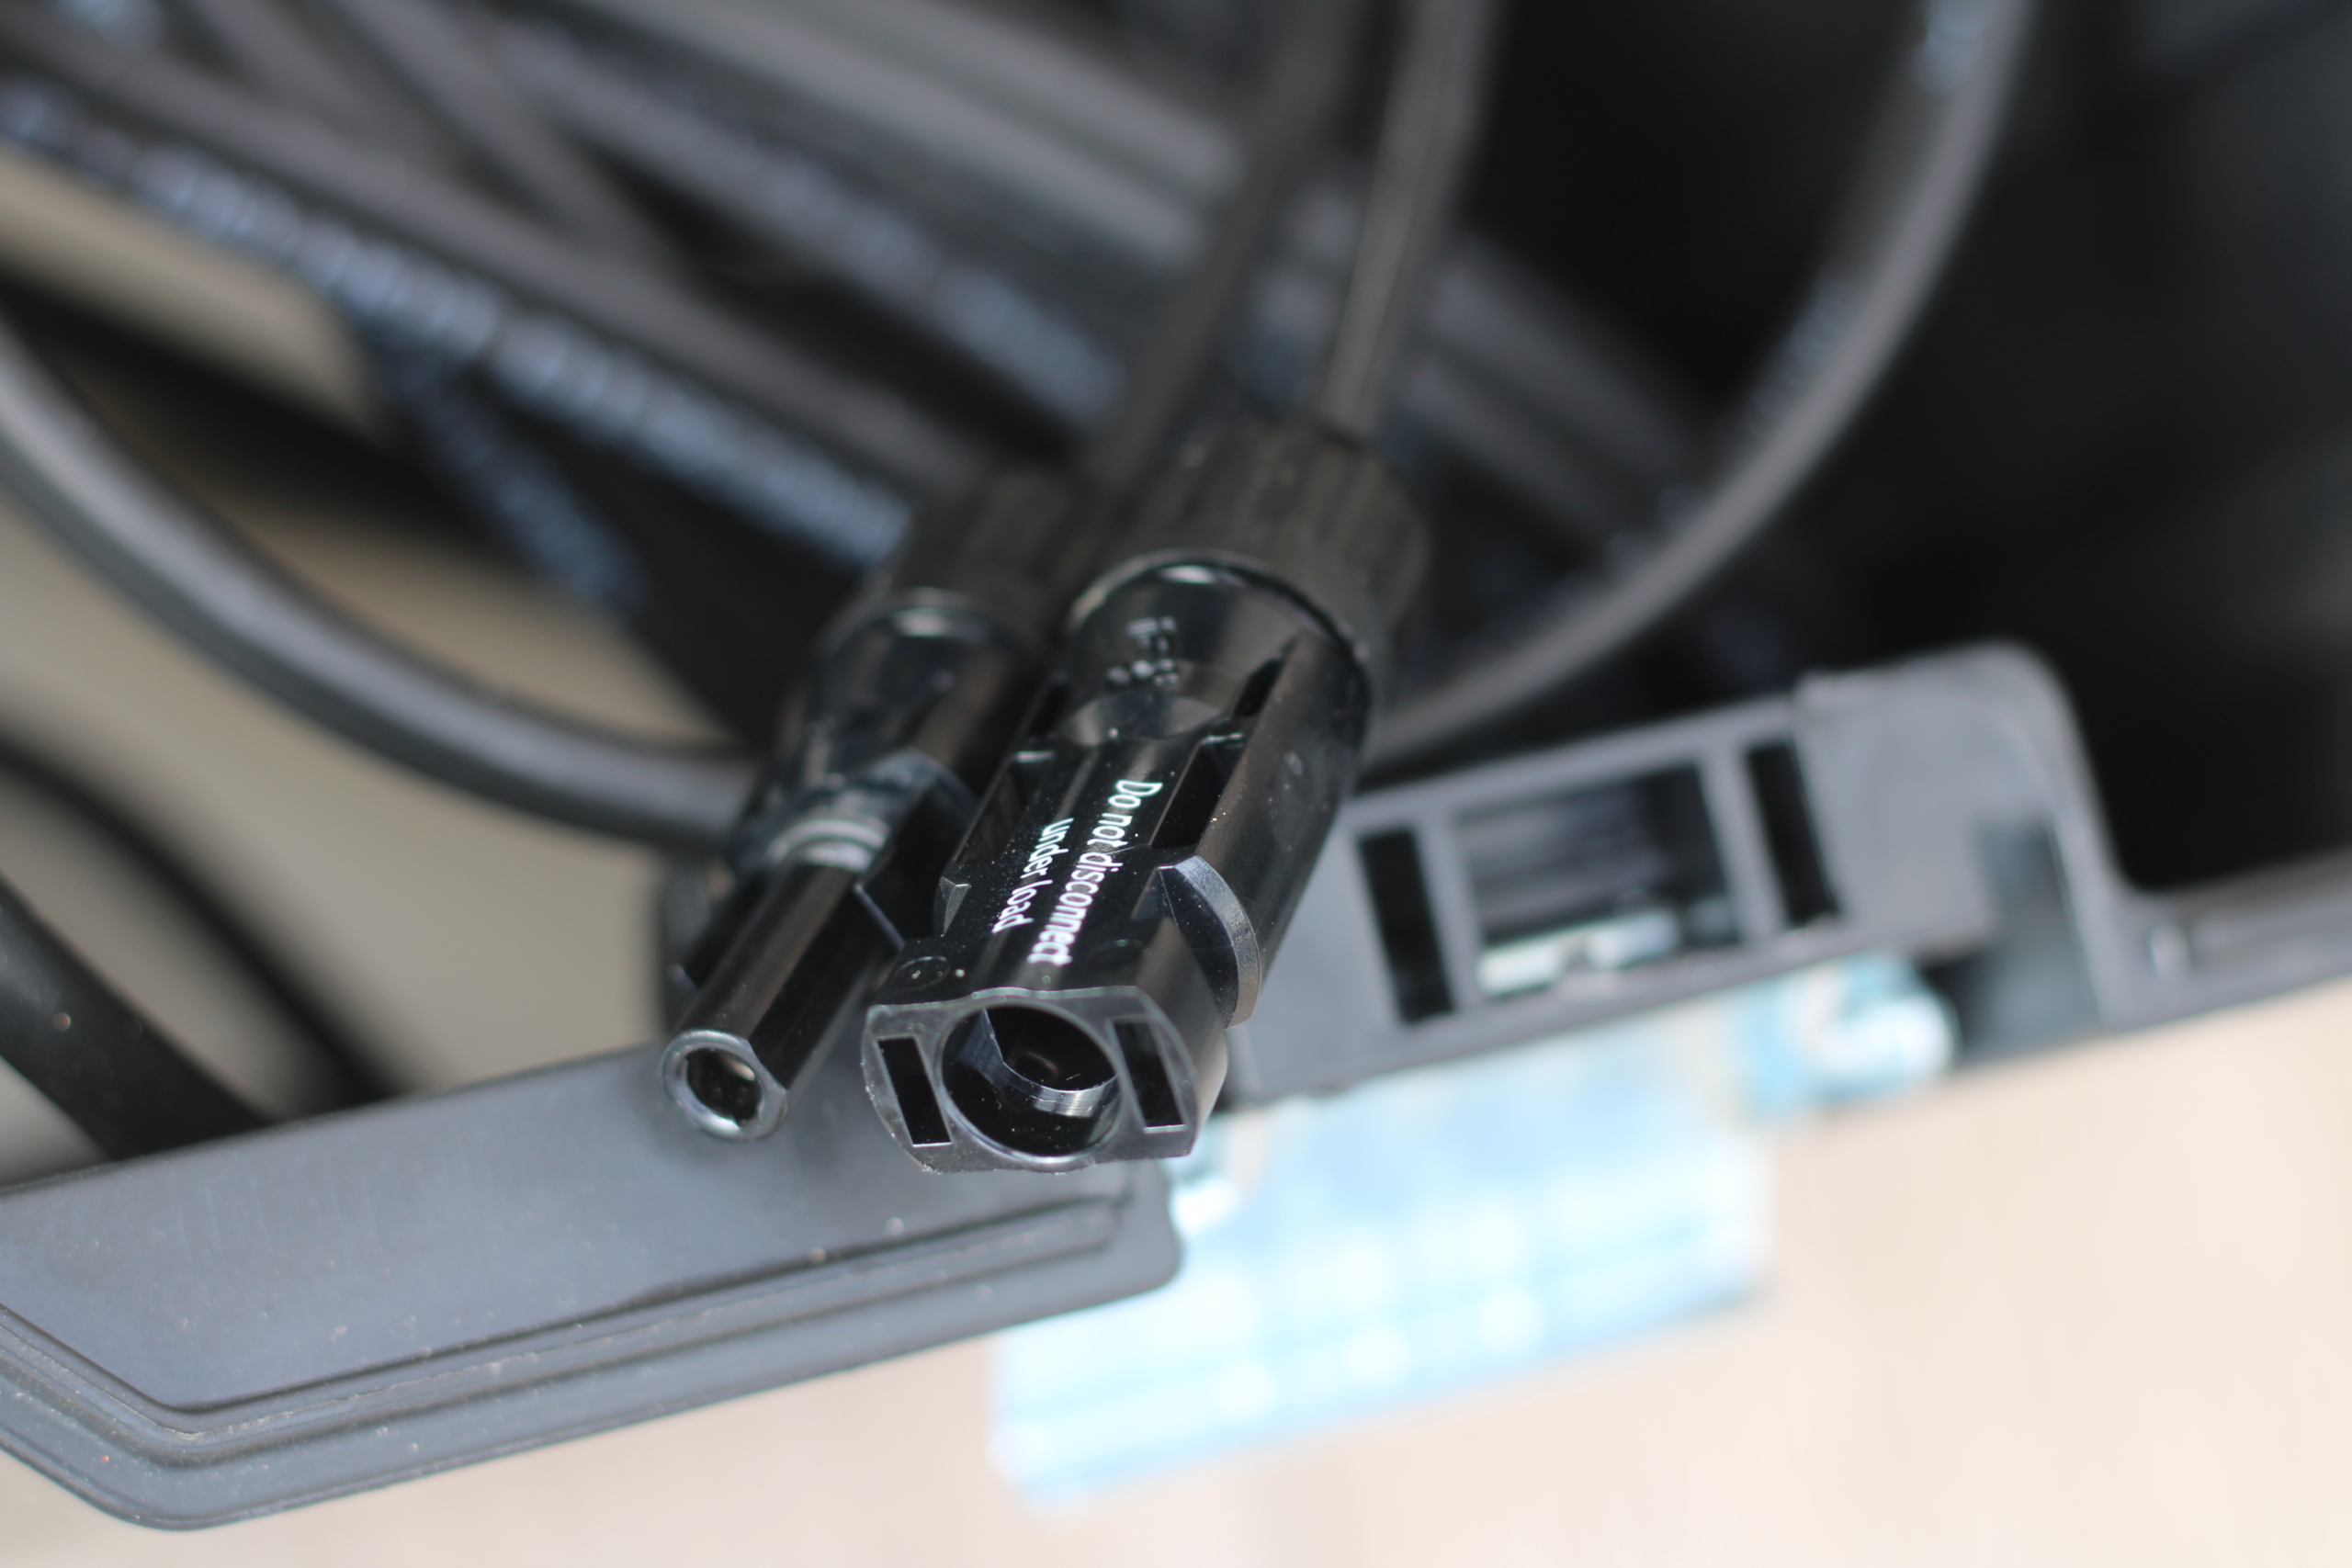
- First, connect the cable to the solar panel. Plus to plus, minus to minus. Since high currents flow, please tighten them firmly. The PV panel is not yet connected.
- Then connect the battery. A 20A fuse must be installed in the plus line. Again, plus to plus, minus to minus.
- The 230V inverter must not be connected directly to the solar inverter because it requires too much power. It must be connected directly to the battery. My inverter came with 2 cables that could not be connected directly. I shortened them, crimped them again and then connected them directly to the battery. Here, too, a fuse is installed directly in the positive cable of the battery, which is also not yet plugged in.
- A standard 12V car socket is connected to the load output of the solar inverter. A fuse is also installed in the socket here. Only small consumers should be connected to the 12V output (chargers or smaller 12V consumers such as LED lights).
- After wiring, the inside of the box is lined with wood and everything is connected with wood glue. The wooden panel is only placed over the battery and can be opened for maintenance purposes.
- For the final test, the PV panel is connected and the fuses are installed. The system switches on automatically. As I use a wet battery, I have set this in the PV inverter. Therefore, please check your inverter to see which types are supported. Then connect the 12V socket to the laptop and check whether charging takes place. If everything works, the cables can still be laid nicely and the battery can be fully charged initially.
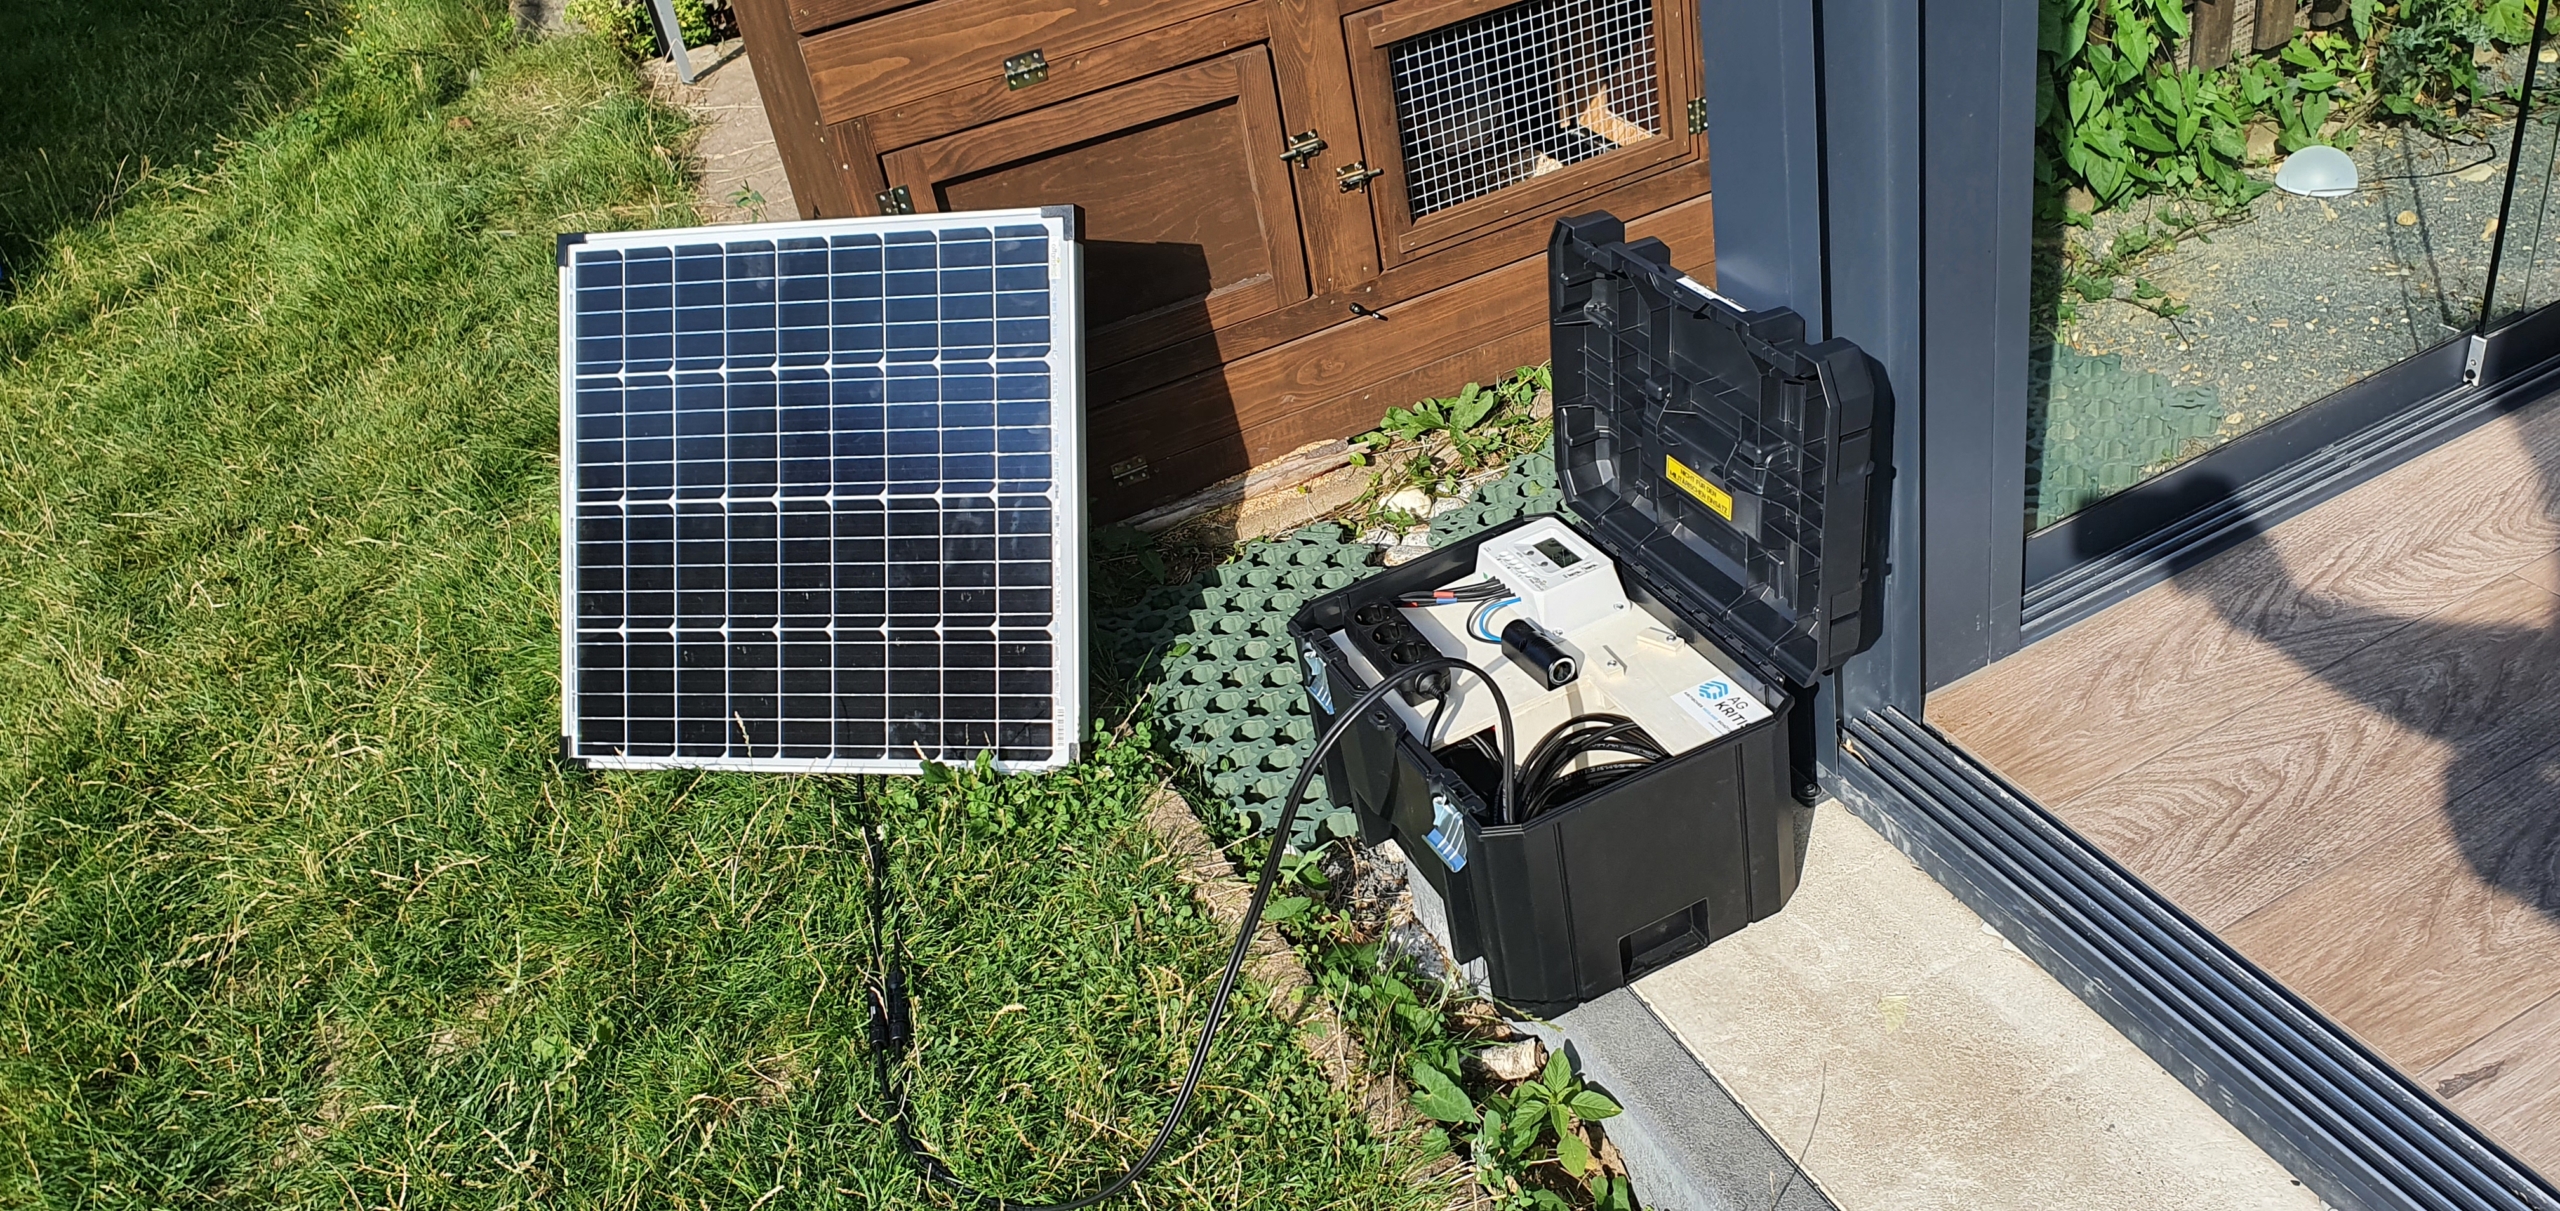
When closed, it fits together with the solar panel in the boot of a car or even in a cargo bike. Thanks to the 6-metre cable, the module can be placed exactly where the sun is.
What is the Box capable of?
Since one should never draw full power from lead-acid batteries (maximum 50%), a 27Ah output can be roughly achieved, which allows the 300W inverter to run for one hour at maximum load. Of course, the inverter rarely uses full power and therefore the battery will usually last a day in field operation. In addition, the battery is charged by the solar panel during operation. Depending on the budget and size of the box, larger batteries can of course be used. However, this also increases the weight. The battery can also be quickly exchanged for another battery with quick-release battery clamps. Therefore, enough cables should be available in the box to be able to quickly connect an external battery. The selection is therefore very variable.
As a planned improvement, an update of the solar inverter to a 30A version is planned, to which the modules of an existing PV system can also be connected directly. For test purposes, a 600W balcony power plant was mounted on the garden house, but this was only designed as an island solution. Several batteries can also be charged here and installed in the mobile system if required. Care was taken to ensure that all PV panels on site (roof, garden, mobile) had MC4 adapters so that they could be interchanged. It is important to ensure that the PV inverters can cope with the power of the modules. Another warning: The PV system on the roof often has DC voltages of over 500V. Please never disconnect the connections under load and make sure in general that the system is switched off and in the best case shaded.
The small box is regularly used for outdoor activities and will also be present at the next CCC camps or the Dutch counterpart.
Partlist:
- Car battery (in my case a starter battery, 12V, 45Ah, 400A)
- 12V to 230V inverter
- 12V socket (a cigarette lighter from the car supply)
- Solar inverter (as a set with solar panel and cable, e.g. from Offgrid Tec. Note: The sets are in great demand and may be sold out at the moment. Many DIY stores also have them on sale, at least in germany)
- PV panel (may be included in the set)
- Connection cable (may be included in the set)
- Tools (jigsaw, side cutters, wood glue, crimping pliers are advantageous)
- Chipboard 1cm
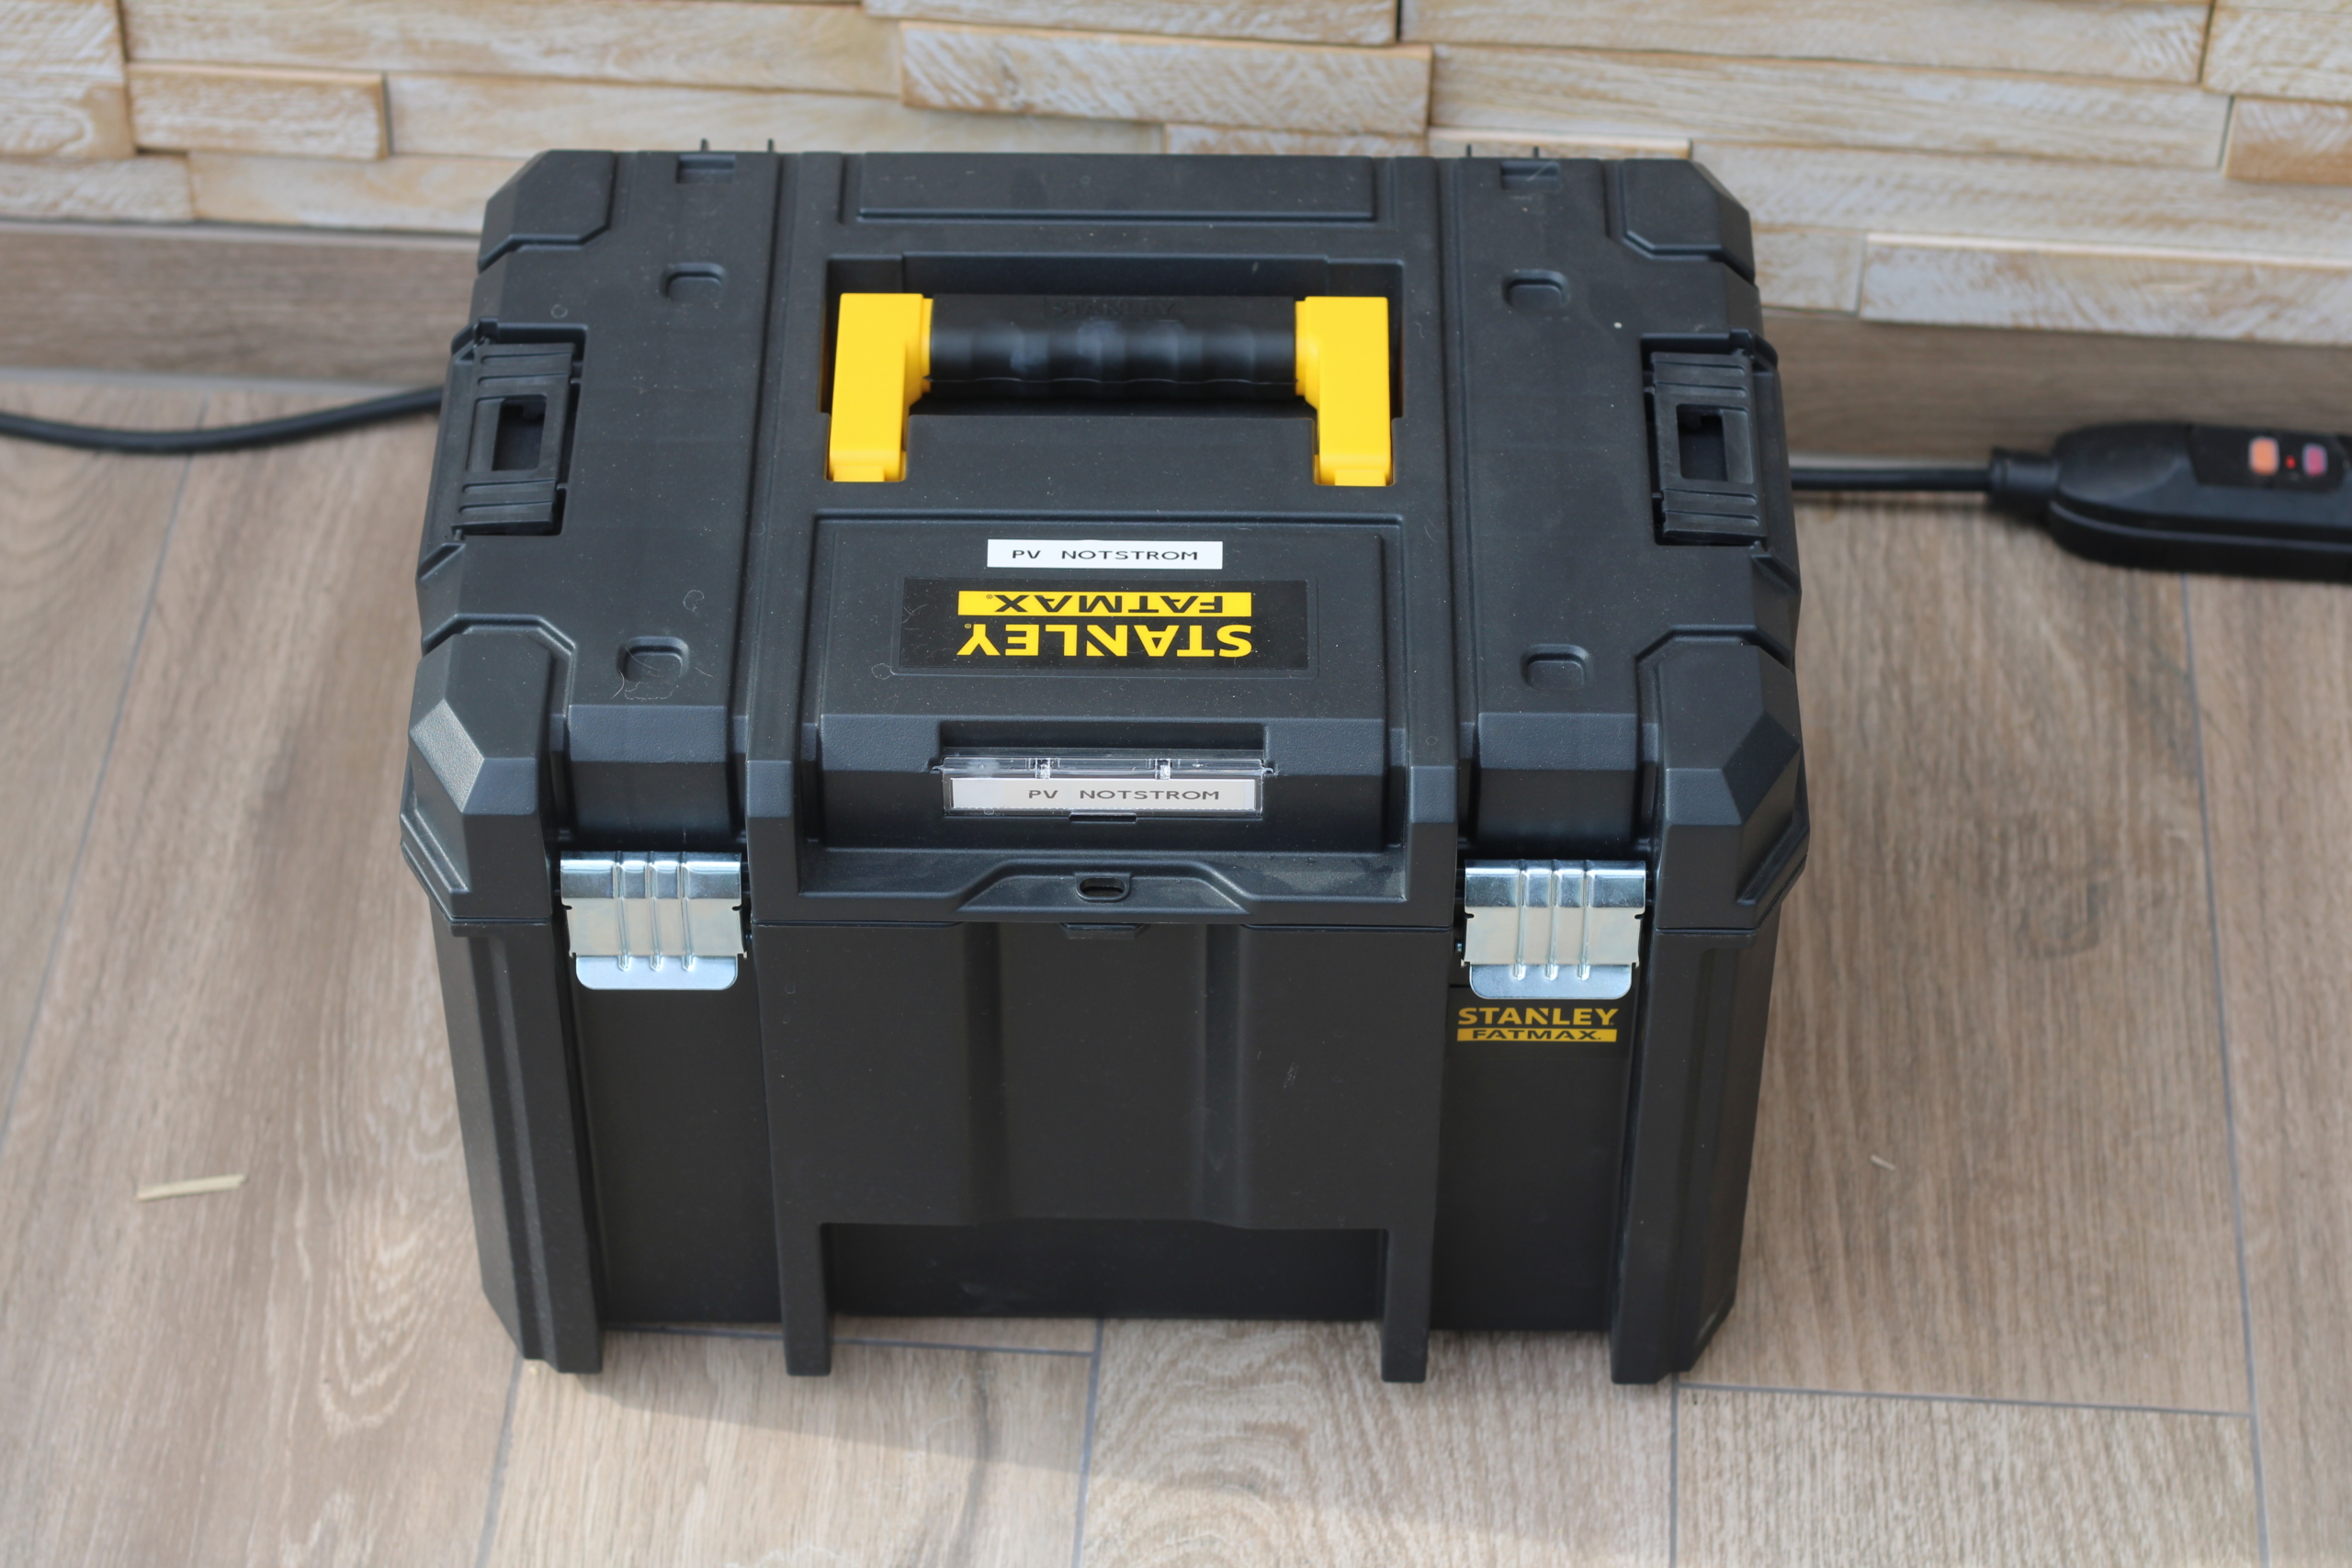
- Box for installation (Here I use a Stanley/DeWalt TSTAK, as I organise all my tools with this)
- Desire to make things 🙂